How to Straighten Hair without Heat or Chemicals
Updated by Linda White on July 30, 2017
- Hair Texture
- » How to Straighten Hair without Heat or Chemicals
If you have naturally curly hair but sometimes want to go straight, then you need a good way to straighten your hair.
It’s certainly fashionable and low-maintenance, so most women are wearing straight hair. But when you apply heat and chemicals, it can damage your curly locks or cause the scalp to become overly dry, and you don’t want that happening.
Whether you visit a salon or do hair straightening at home naturally, you should protect your hair from heat damage, chlorine in swimming pools, and salt water. Straightening irons and curlers are not kind to hair.
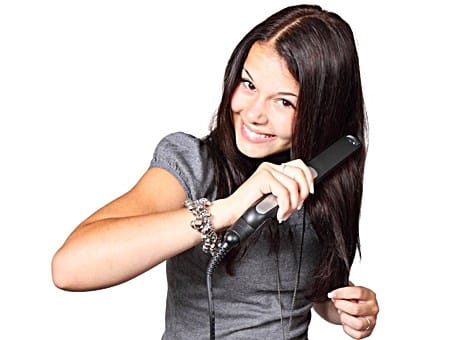
There are safer ways to get straighter and easier-to-manage hair, such as the AsaVea Hair Straightening Brush. We like it because it won’t burn your hair or scalp.
Table of Contents:
The Ultimate Guide to Straightening Hair without Heat at Home
You don’t have to spend hours at the salon to straighten your hair, do it at home. We have a list of ways to straighten hair naturally and without heat. As a matter of fact, these methods help to make your hair healthier than before.
There aren’t any chemicals in the process either, so there aren’t any side effects or risks like your hair turning blue.
Let’s check out these home remedies:
Natural Hair Straightening Masks
Olive Oil Mask
Who doesn’t know olive oil is the industry’s leading seller? Olive oil for the hair dates way back.
It’s a simple recipe which only calls for 30 gm of oil, 30 gm of organic conditioner or ammonia free, and a teaspoon of essential oil or a capsule of Jasmine.
Blend the ingredients until creamy. After you shampoo your hair, apply the mixture. Don’t condition it yet, but let it stand for twenty minutes. Rinse it out of the hair thoroughly and comb. Dry your hair naturally.
Fruit and Honey Mask
Honey has many benefits. The natural goodness serves a multitude of purposes.
Honey can protect from the wind, UV rays, hair dryers, salt water, chlorine, hair dyes, and old man winter. More so, honey puts back moisture in the hair.
Fresh fruits contain large quantities of antioxidants, minerals, and vitamins. In other words, there’s more nourishment in a banana that you thought. To make a fruit and honey mask, you’ll need 2 oranges, half of a banana, 5 tablespoons of raw honey.
Here is a quick step-by-step guide:
- Peel and of course, slice the banana while you’re juicing the oranges.
- Put this into the blender and blend until its texture is smooth.
- Wash and dry your hair.
- Apply mixture to hair completely.
- Wait one hour and shampoo out.
- Condition as you would normally.
Celery Straightening Treatment
Celery for the hair; who knew, right? For this treatment, you’re going to need a couple of celery stalks.Here’s how it works:
Here’s how it works:
- Put the celery in the blender cup and add cold water.
- After you blend the two ingredients, strain the juices.
- Pour them into a glass bottle and let set overnight.
- The next morning, you will need to massage in the mixture well into the hair and scalp.
- Rinse and shampoo.
Here are 5 other DIY hair mask ideas for damaged hair.
Egg and Honey Treatment
This is a homemade remedy to straighten curly hair is painless and easy to remember:
- Take one egg and separate it.
- Take the egg white and a tablespoon of raw honey and virgin olive oil and mix together.
- When you see a creamy paste start to form, apply to damp hair, including the scalp.
- Cover your hair with a shower cap and towel to hold in the heat. This dry hair treatment only needs 30 minutes to be effective.
- Repeat every two weeks.

Milk treatment
Apply milk to the hair just once a week and watch your hair improve significantly. How? Milk adds moisture to your strands to make it easy to straighten hair. All you’ll need is a spray bottle, heat (for the milk), and whole milk.
If you have tight curls, the milk will relax the wave and provide assistance to other straightening home remedies.
- Boil the milk to free the preservatives and let cool. Next, pour about a third cup of the milk into a spray bottle. Put into fridge to finish cooling.
- Gather a clean microfiber towel and lay across your shoulders. This will catch the remaining milk and prevent it from dripping on your clothes.
- Saturate your hair with the milk, completely covering the whole head. Part your hair into sections and comb through.
- Using a wide tooth comb, distribute the mixture over the hair. Make sure to start at the ends of the hair and not the roots.
- Leave in for about 20 minutes or up to 45 minutes. Read or watch a little TV or finish your chores while you wait. Your hair will be more manageable, plus the overall conditions of the hair will improve providing you treat your hair on a weekly basis.
- After leaving it on for a while, you should wash your hair. Don’t forget you’ll still need to condition it as well. You can hop in the shower and rinse your hair.
- Allow hair to air dry.
How Does Coconut Milk Straighten Your Hair?
Home remedies are mostly made with organic or natural products. The benefit is there’s no damage or side effects from them. Unless, of course, you’re allergic to a specific ingredient. In this case, you should always check the label.
You can find coconut milk on the shelves at many grocery stores and health food stores. However, you shouldn’t mistake coconut milk with coconut water. Pick up some coconut milk in the can or in the powder form. Both are delicious.
Nonetheless, coconut milk and lemon juice will help to straighten your hair. Coconut milk works as an effective conditioner for all types of hair, for both men and women.
Here’s a quick guide:
- Just mix the two together and comb through.
- Wait about 2-3 minutes and wash your hair with warm or lukewarm water.
- The coconut milk goes deep to penetrate the scalp. Not only that, but it nourishes the cuticles. Remember, milk is good for the body. In this case, it’s the scalp and hair.
Pure coconut milk provides nourishment to the hair follicles, did you know that? Yes, it also improves the texture of your hair as well as change the overall condition of your strands for the better.
How Often Should You Use Coconut Milk?
How often depends on the amount of hair damage. We would recommend using coconut oil about once a week if you have minimal damage.
If your hair is dry and brittle or if you have split ends, perhaps you’d do better using the treatment up to three times for the first week and taper off as you see improvements.
See if this recipe suits you:
Deep Conditioning Treatment with Coconut Milk
Gather a shower cap, about four tablespoons of your favorite coconut milk and a tablespoon of honey. Put the ingredients into a small container, mix together and set the microwave for two minutes.
If you have really oily hair, add a teaspoon of castor oil or olive oil. When done, apply to hair thoroughly and put on a shower cap. Paint your toes or do some laundry while you wait. You have one hour before shampooing.
Using a Blow Dryer to Straighten Hair
Wavy, curly hair can be sometimes difficult to maintain. It’s the number one reason women with curly locks want straight hair. Okay, we get it. Happily, there are methods to straightening your hair without adding chemicals to your tresses.
Recipes you do at home are healthier for your hair. Here are a couple of methods you can try at home:
- Use a detangler to your wet hair and use a wide tooth comb to comb out. If you don’t have a comb, you can substitute with a soft (bristle) brush. Blow your hair dry while removing kinks and without harming your locks.
- Because the hair is curly, it has the capacity to tangle when it dries. Continue to comb or brush out while drying.
- Separate your hair into about three sections. Part down the middle and tie off or clip each side and the remaining hair in the back. Select the lowest dryer setting and use close to the hair and scalp as comfortably possible.
- Gently brush each part making sure you are not snapping the strands.
- Blow hair dry by section. Hold the brush in one hand and trace with your brush the hair dryer. Take care to get to the roots. Once dry, move on to the next part. Continue till all done.
It’s time to take a break from the heat. Using the lowest setting on a blow dryer will prevent hair damage.
The Wrap
It may seem a little weird but it works. It’s uncomplicated and anyone can do it; short hair, medium length hair, and long hair.
- After washing and conditioning your hair, air dry your hair until damp.
- Next, part your hair into about four sections.
- Brush each part tightly and form a circle or wrap around your head.
- Pin it up so it stays in place. You can leave in all day or overnight.
- When you take it down, you’ll have straighter hair.
If it’s still not to your desired look, use a low setting on the flat irons. Keep in mind the thickness and length of your hair. You may need to add more parts if your hair is extra long.
- Tip: Use only one clip or bobby pin to hold hair in place to avoid knotting up the hair at the ends.
Brush dry
Again, curly hair is naturally harder to straighten, so you rely on a couple of methods to attain the right style. Some styles require blow drying or by brushing the hair dry. In that case, you can go from the shower to a wide range of styles.
After the shower, pat dry with a microfiber towel. Once you remove the excess water, use a wide tooth comb or brush the tangles out. Do this until your hair is dry.
- Tip: Whatever you do, don’t use a round brush. Those brushes are a thing of the past. However, they are good for curling the hair, but we’re doing the opposite and want to straighten the mane.
Reach for your brush with the soft bristles or a paddle brush.
Rollers
Rollers haven’t gone out of style either. You will need rollers that fit your hair. If you have long hair, you should buy extra-large rollers. That makes sense, right?
You want the hair to go over the roller with wrapping the hair. If you decide to blow your hair dry, remember to use the lowest or cool setting. Preferably, you should let dry naturally. The end results are long, straight strands of shiny hair.
As an alternative, start with dry hair or moist hair. If you decide to roll your hair while it’s dry, you will need heat to straighten the curls.
Brush the tangles out, a part hair into a few sections. One big part in the back and two on each side. Depending on what size the roller is, you want to section the hair so it lays next to another roller. Pin so it stays put.
Let air dry or select a cool setting on your dryer. You can use low heat if you want on dry hair to straighten your hair. The process will take a bit longer if you decide to air dry, however.
Pull Your Hair Up to Dry
Buns are always stylish so no one will think twice about it. If you have long hair, you may prefer to use this method of straightening the hair. Pin the hair up around your head to keep it from kinking up.
Because of the bun style, your hair should have slight curls when you take it down. But as a style when you’re on the go, it’s simple, looks professional and is appropriate for night looks.
Here’s how to create the right look:
- Pull your hair into a bun while it’s still damp.
- Pat dry with a towel.
- Brush or comb using a detangling comb.
- Comb or brush hair to the back like you are going to make a ponytail.
- Twist and roll your hair into a fabulous bun.
- Use a decorative accessory to hold in place or bobby pins work just as well. You’re done.
How Can I Permanently Straighten Hair without Chemicals?
For those who have waves, you may want to make sure you want a change. Using the milk treatment could be permanent. Use a straightening mask twice weekly if you’re serious about going straight.
This idea is pretty easy to manage:
- Begin with a clean head of hair. Brush strands dry.
- Use one full cup of coconut milk, a couple tablespoons of olive oil, three spoons of cornstarch and up to six tablespoons of pure lemon juice.
- Low temperature to heat and stir.
- Apply to hair and leave on for about half an hour.
- Rinse well. Repeat until straightened to your desire.
Although there are plenty of ways to straighten the hair without chemicals or heat, we haven’t taken a look at the straightening brush. Do you have any experience with the brush? If not, keep reading to find out more information.
Which Hair Straightening Brush is the Best?
The infamous brush that straightens hair was well welcomed by thousands of women. What a neat idea, right? You can brush and straighten at the same time.
The hair straightening brush is an innovative idea that takes steps out of your hair care routine. You don’t have to pull out the straightening iron or the blow dryer. You can save money by scheduling fewer appointments at the salon.
The straightening brush is a safe and enjoyable way to tame your locks. It’s easy to use. Heat the brush and use like normal.
Since the electric brush hit the marketplace, women have stopped using other styling tools. What seems to work best for a lot of women is the AsaVea Hair Straightening Brush.
The AsaVea Hair Straightening Brush
AsaVea is an impressive tool and it’s affordable as well. The styling tool features six temperature settings, a modern ceramic design that eliminates the chances of burning your hair.
The AsaVea Hair Straightening Brush heats up in seconds so you get a salon look. Always use a heat protector. If you don’t have one, use coconut or Argan oil before using straightening rods.
Related Posts:
How to Prevent Hair Loss: Evolution Hair Сare and Things You Need to Know About It
Best Anti-Frizz Flat-Iron: Top 10 Straighteners for Taming the Frizziness!
Best Professional Flat Iron for Thick Hair: An In-Depth Buyer’s Guide
How to Change Your Hair Texture (without Chemicals)!